Building & Signing Tests
ProjectAchilles can cross-compile test binaries directly from the web UI using the backend's Go toolchain.
Build Process
- Navigate to a test's detail page
- Click the Build button
- Select the target platform (Windows, Linux, macOS) and architecture (amd64, arm64)
- If the test has
//go:embeddirectives, upload the required dependency files - Click Build to trigger cross-compilation
- Once complete, click Download to get the signed binary
Platform & Architecture Support
| Platform | Architecture | Code Signing |
|---|---|---|
| Windows | amd64 | Authenticode (osslsigncode) |
| Linux | amd64 | None |
| macOS | amd64, arm64 | Ad-hoc (rcodesign) |
Code Signing
Windows (Authenticode)
Windows binaries are signed with Authenticode using osslsigncode and a PFX certificate. Manage certificates in Settings → Certificates.
macOS (Ad-Hoc)
macOS binaries receive ad-hoc signatures via rcodesign. No certificate is required — the signature prevents Gatekeeper from quarantining the binary.
Linux
Linux binaries are not signed.
If signing fails (missing certificate, tool error), the build continues and produces an unsigned binary.
Embed Dependencies
Some tests use Go's //go:embed directive to embed files into the binary. The UI detects these directives and shows upload fields for each required file.
- Source-built dependencies (compiled from Go source by
build_all.sh) show a wrench icon and "Auto-built" label — no upload needed - External dependencies (pre-compiled binaries) show an upload button — the Build button is disabled until all external deps are uploaded
Build Caching
Built binaries are cached by platform and architecture. Subsequent requests for the same build return the cached binary instantly. The cache is cleared when the test source changes.
Availability by Deployment Target
| Target | Build from Source | Upload Binaries |
|---|---|---|
| Docker Compose | Yes | Yes |
| Railway | No | Yes |
| Render | Yes | Yes |
| Fly.io | Yes | Yes |
| Vercel | No | Yes |
Build Section in the Test Detail Page
The Build section appears in the left sidebar of every test's detail page. It manages the full compile-sign-download workflow.
Build Status Display
When a build already exists, the Build section shows:
- Filename of the compiled binary
- Target platform and architecture
- Signature status (signed or unsigned)
- File size
- Download button to retrieve the binary
When no build exists, a Build button is shown instead.
Build Workflow
Embed Dependency Handling
The UI scans Go source files for //go:embed directives and categorizes each dependency:
| Dependency Type | Icon | Action Required |
|---|---|---|
Source-built (compiled from Go source by build_all.sh) | Wrench | None -- "Auto-built" label shown |
| External (pre-compiled binary) | Upload | Must upload before building |
The Build button remains disabled until all external dependencies are uploaded. Source-built dependencies are compiled automatically as part of the build process.
When uploading a Windows executable dependency, the UI performs client-side validation by checking for the MZ header (the first two bytes of any PE executable). Invalid files are rejected before upload.
Multi-Binary Bundles
Some tests use a multi-binary architecture where each validator is a separate embedded binary. For these tests:
- The
build_all.shscript compiles all validators from source - The active signing certificate is passed to the build script for signing each validator
- Validators are embedded into the final orchestrator binary
- The entire process runs as a single build operation from the UI
Execution Drawer
The Execution Drawer is a slide-out panel that appears when you click Execute on a test (or select multiple tests and choose batch execution). It orchestrates the full path from agent selection to task creation.
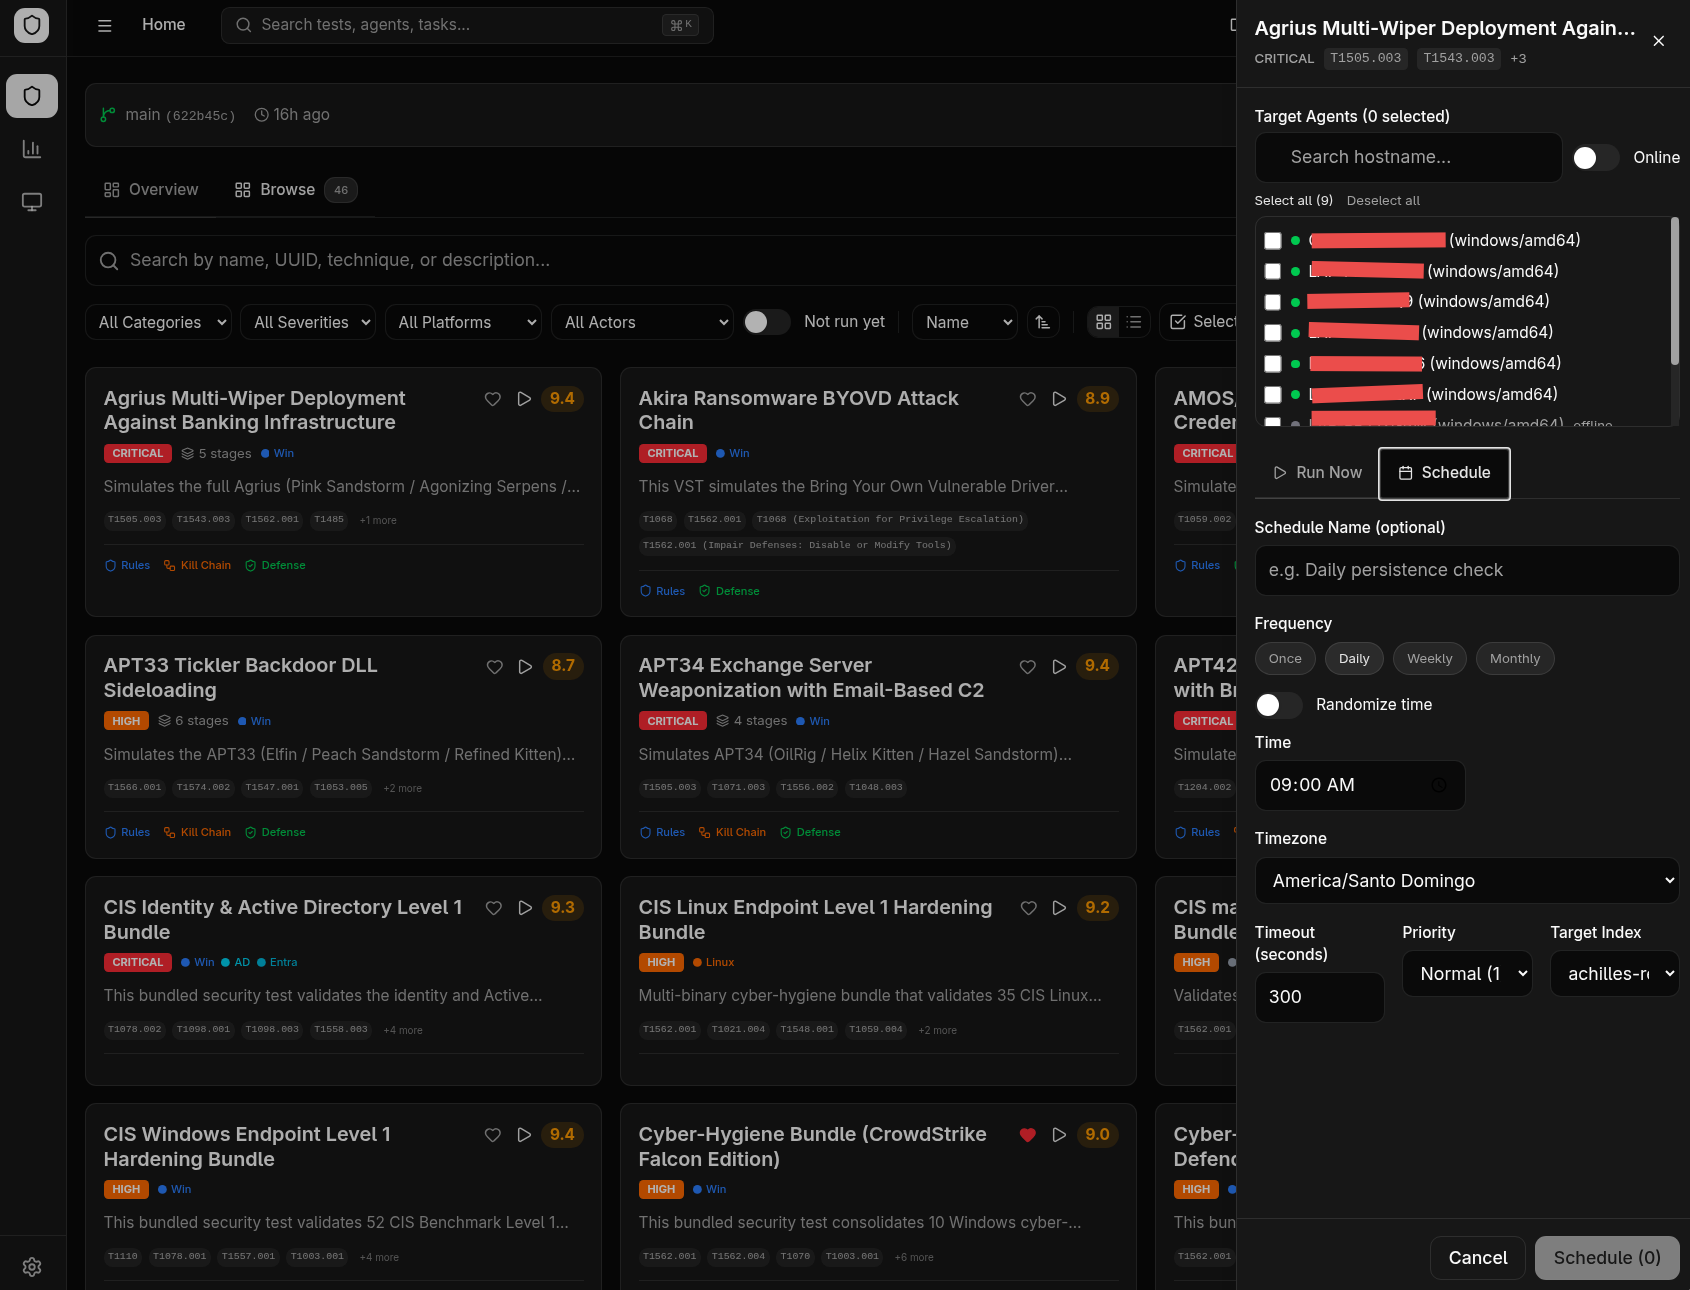
Agent Selector
The drawer includes an agent selector with:
- Search by hostname -- Filter the agent list by typing
- Filter by tags -- Multi-select tag dropdown
- Online-only toggle -- Exclude agents that are not currently connected
- Select All / Deselect All -- Bulk selection for the currently filtered list
- Each agent row shows its status indicator (online/offline), hostname, OS/architecture, and tags
Execution Configuration
Two tabs control how the test runs:
Run Now tab:
- Timeout -- Maximum execution time in seconds
- Priority -- Task priority level (1--3)
- Target index -- Elasticsearch index for result storage
Schedule tab:
- Once -- Date and time picker
- Daily -- Fixed time or randomized within business hours
- Weekly -- Day selection with time configuration
- Monthly -- Day of month with time options
- Timezone selection from common zones
Pre-Execution Validation
Before submission, the drawer validates:
- At least one agent is selected
- All tests have valid builds (the drawer offers to build missing tests inline)
- Azure credentials are configured for tests that require Entra ID integration
- Schedule configuration is valid (future dates, selected days, etc.)
Batch Execution
When multiple tests are selected:
- The drawer shows a summary of all selected tests with their build statuses
- A Build All button compiles any tests that lack builds
- Individual test build failures are non-fatal -- the remaining tests can still be submitted
- Tasks are created for each test-agent combination
The execution drawer checks build status automatically. If a test has not been built yet, you can trigger the build directly from the drawer without going back to the test detail page.